This page introduces the basic steps involved in restoring a flat roof illustrating an actual case history. |
Many typical problems found with flat roofs were encountered on this roof:
- Bad installation
- Poor roofing practices (not using a termination bar at wall flashings)
- Careless rooftop equipment service personnel (screws dropped and left on the roof)
This particular roof restoration was over EPDM rubber, it illustrates how Andek products can ne used to restore any roof to provide 10 or even 20 years of service without having to tear off the old roof. |
|
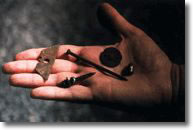
Some of the items on the roof that will certainly cause leaks: Knife blades, screws, nails and yes....a bullet!
|
| |
|
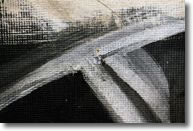
The smallest tear or cut can result in major water damage.
|
| |
|
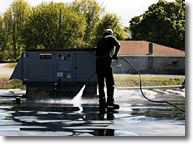
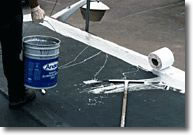
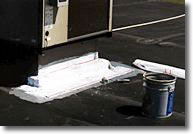
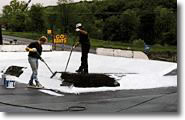
All dirt and debris should be removed by pressure washing after major leak areas have been spot repaired.
|
| |
|
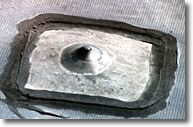
Here you can see where fasteners have backed out from the deck and have been poorly repaired with a patch of EPDM rubber.
|
| |
|
To repair this correctly, cut open the area around the fastener. Replace the old fastener with one of a larger diameter for grip. Pour Polaroof RAC into the hole to seal it. Cover the fastener with a piece of Roofab embedded in Polaroof RAC.
|
| |
|
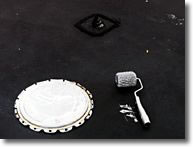
Seal the edges with Polaroof RAC and Roofab. Use either a 3" roller or Andek Fabtool to spread the coating, completely saturating the fabric.
|
| |
|
Seal and reinforce all the seams by spreading out Polaroof RAC and laying the Roofab into the coating. Add more coating on top to thoroughly embed the Roofab.
Notice the patches in the background over the fastener repairs.
|
| |
|
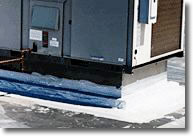
Here you can see the original EPDM had been applied directly to T1-11 with no termination bar, allowing water to seep down the grooves. To correct this, the grooves were sealed with a grout mixture of Polaroof RAC and fine sands. Two strips of Roofab were then applied as a counterflashing repair and the T1-11 was treated with a coat of Polaroof RAC.
|
| |
|
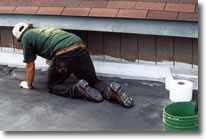
Rooftop equipment and air conditioning units must have the flashing details reinforced with Roofab and Polaroof RAC
|
| |
|
The Roofab must be thoroughly embedded in Polaroof RAC.
|
| |
|
Repeat this process around all four sides, overlapping at the corners.
|
| |
|
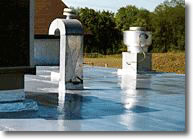
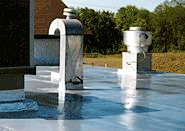
Treat all equipment and penetrations with Roofab and Polaroof RAC.
Starcut a hole in a square piece of Roofab, apply Polaroof RAC to the roof and penetration, saturate the Roofab, then counterflash with a 6" wide strip of Roofab.
|
| |
|
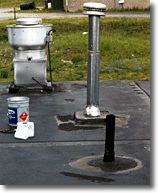
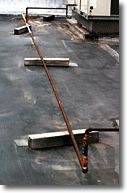
Realign any pipe or equipment supports. Apply a coat of Polaroof RAC under the supports as a waterproofer and adhesive.
|
|
| |
|
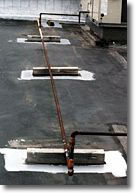
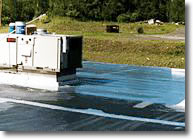
All the seam and flashing repairs with Polaroof RAC and Roofab are now complete.
|
| |
|
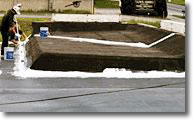
On one section of the roof, a raised section had been treated with torch applied modified bitumen. This is not acceptable roofing practice with EPDM rubber. Polaroof RAC, however, can be used with Roofab to tie in two different.
|
|
| |
|
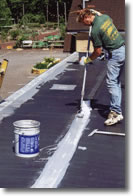
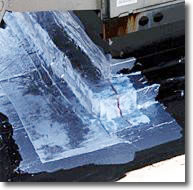
The roof can now be coated with two coats of Polaroof RAC. The first coat can be applied at the same time as the seam repair and detail work.
|
| |
|
Wherever there is a grease vent, add OZ Catalyst to the Polaroof RAC. This toughens the coating, making it grease and fat resistant.
|
| |
|
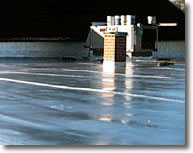
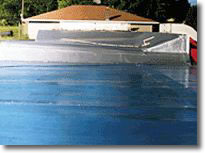
And there you have it ! Your restored roof, complete with reinforced flashing details, strengthened seam details, solar reflectivity, UL class "A" and Factory Mutual approved and a 10 year material warranty.
|
|
| |